Participant Support Procedures > Rostering Shifts on Carelink+
Authorised by Chief Executive Officer
Issue Date: 30 April 2024
1. Rostering a 1:1 shift that is non-recurring
1.1 Open Carelink and search the Participant that requires the service.
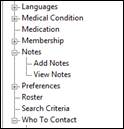
1.2 Click on Roster in the menu (tree) to the left.

1.3 Option 1: This can be done in Table View or Calendar View
1.4 Make sure the screen is blue and Go To Rules is below view; if screen is yellow click the same two-way button that will say Go To Shifts. Then click on the New Roster Item to the left.
![]()
1.5 Check the Start Date and End Date are correct, check the participant is correct.
1.6 Select the Funding Details and Employee, by clicking the drop down arrow at the right end.
1.7 Type in the Start Time and End Time (examples 3.15pm or 1515), then click in Duration to check it is the correct hours. If the duration hours are not correct check the End Date and change if needed.
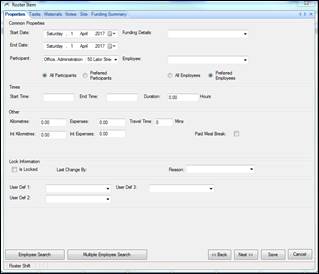
1.8 You can enter any Notes related to the shift by clicking on the Note tab at the top and once note is written click Save Note.
1.9 Then click Save.
1.10 Option 2: This can only be done in Calendar View
1.11 Make sure the screen is blue (not yellow which is Rules) and Go To Rules is below View.
1.12 Find the date of the shift, across the top.

If the shift date is not across the top, either hit the right blue arrow until you find it

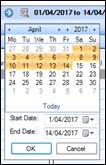
or the calendar with the magnifying glass beside it and select the date that you want.

1.13 Once you have the day of the shift, left click anywhere on the day. You will have a blue line.
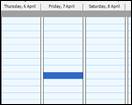
Then right click and select New Shift. Check the Start Date and End Date are correct, check the participant is correct.
1.14
 Select the Funding
Details and Employee, by clicking the drop down arrow at the right end.
Alter the Start Time and End Time (examples 3.15pm or 1515), then click in Duration to check it is the correct hours. If the duration hours are not correct check the End Date and change if needed.
1.15 You can enter any Notes related to the shift by clicking on the Note tab at the top and once note is written click Save Note.
1.16 Then click Save.
1.17 Option 3: This can only be done in Calendar View
1.18 Make sure the screen is blue (not the yellow Rules view) and Go To Rules is below view.
1.19 Find the date of the shift, across the top.

If the shift is not across the top, either hit the right blue arrow until you find it

or the calendar with the magnifying glass beside it and select the date that you want.
1.20 Once you have the day of the shift, left click on the start time of the shift and drag down to the finish time.
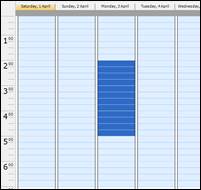
Then right click on the highlighted area and click on New Shift.
1.21 Check the Start Date, End Date, the Participant, the Start Time, the End Time and Duration are correct.
Select the Funding Details and Employee, by clicking the drop down arrow at the right end.
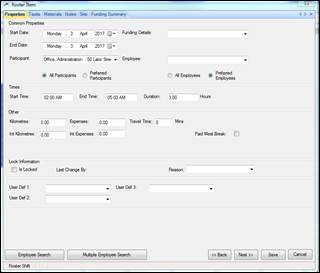
1.22 You can enter any Notes related to the shift by clicking on the Note tab at the top and once note is written click Save Note.
1.23 Then click Save.
2. Rostering 1:1 that will reoccur (creating a Rule)
2.1 Open Carelink and search the Participant who requires the service.
2.2 Click on Roster in the menu tree to the left.
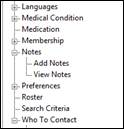
2.3 Option 1: This can be done in Table View or Calendar View
Make sure the screen is yellow (Rules view) and Go To Shifts is below View. Then click on the New Roster Item, that looks like a sheet of paper with a yellow badge, to the left.

2.4 Check the participant is correct.
2.5 Select the Funding Details and Employee, by clicking the drop down arrow at the right end.
2.6 Type in the Start Time and End Time (examples 3.15pm or 1515), then click in Duration to check it is the correct hours.
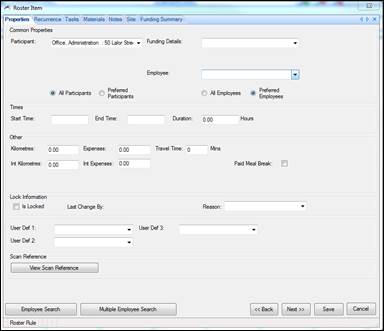
2.7 Once the details are filled in, click on the Recurrence Tab (at the top) or click the Next button (at the bottom).
2.8 Selecting the Recurrence Pattern, ask the following question;
2.9 When does it happen? Then click the circle to the left of Daily, Weekly, Monthly or Yearly.
![]()
![]()
![]()
![]()
2.10 Fill in the details of how often it happens.
2.11 Now fill in the Range of recurrence.
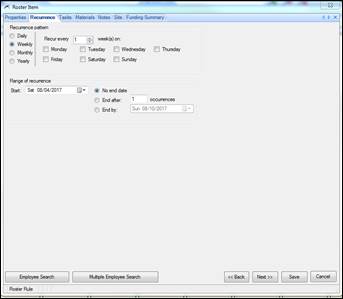
2.12 Select the Start date.
2.13 Then either select end after the number of occurrences or select an end date.
If there is no end date (which is usually the case) please do not select No end date, as a calendar doesn’t stop neither will your rule. That much data will slow the system down. So please select an end date of 3 to 6 months away. This can be easily extended.
2.14 You can enter any Notes related to the Rule by clicking on the Note tab at the top and once the note is written click Save Note.
Now double check your start date and then click Save.
It is highly recommended to recheck the start date, because once you have saved the Rule, this is the only thing you cannot change.
2.15 Option 2: This can only be done in Calendar View
2.16 Make sure the screen is yellow and Go To Shifts is below view.
2.17 Find the date of the shift, across the top.

2.18 If the shift is not across the top, either hit the right blue arrow until you find it

or the calendar with the magnifying glass beside it and select the date that you want.

Once you have the day the rule will start, left click anywhere on the day. You will have a blue line.
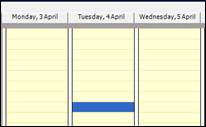
2.19 Then right click and select New Rule.
2.20 Check the participant is correct.
2.21 Select the Funding Details and Employee, by clicking the drop down arrow at the right end.
2.22 Alter the Start Time and End Time (examples 3.15pm or 1515), then click in Duration to check it is the correct hours.
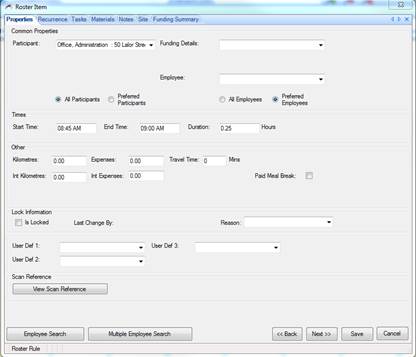
2.23 Once the details are filled in, click on the Recurrence Tab (at the top) or click the Next button (at the bottom).
2.24 Selecting the Recurrence Pattern, ask the following question;
When does it happen? Then click the circle to the left of Daily, Weekly, Monthly or Yearly.
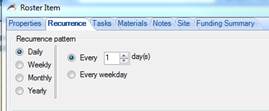
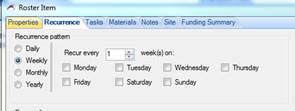
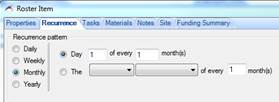
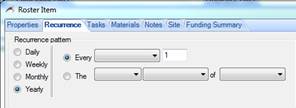
Now fill in the details of how often it happens.
Now fill in the Range of recurrence.
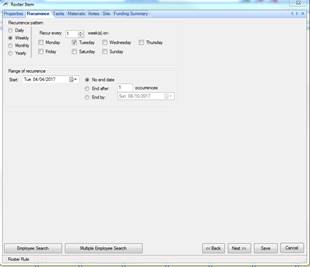
2.25 Check the Start date (it should be the same as the day you selected).
2.26 Then either select end after (how many) occurrences or select an end date.
If there is no known end date (which is usually the case) please do not select No end date, as a calendar doesn’t stop and neither will your rule. That much data will slow the system down. So please select an end date of 3 to 6 months away. This can be easily extended.
2.27 You can enter any Notes related to the Rule by clicking on the Note tab at the top and once the note is written click Save Note.
2.28 Now double check your start date and then click Save.
It is highly recommended to recheck the start date, because once you have saved the Rule, this is the only thing you cannot change.
2.29 Option 3: This can only be done in Calendar View
2.30 Make sure the screen is yellow and Go To Shifts is below view.
2.31 Find the date of the shift, across the top.

If the shift date is not across the top, either hit the right blue arrow until you find it

or the calendar with the magnifying glass beside it and select the date that you want.

2.32 Once you have the day the rule will start, left click on the start time of the shift and drag down to the finish time.
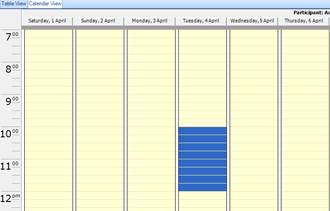
Then right click on the highlighted area and click on New Rule.
2.33 Check the Participant, the Start Time, the End Time and Duration are correct.
2.34 Select the Funding Details and Employee, by clicking the drop down arrow at the right end.
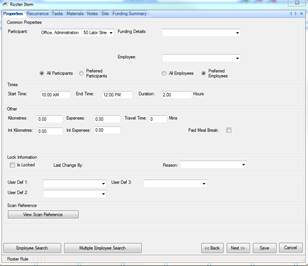
2.35 Once the details are filled in, click on the Recurrence Tab (at the top) or click the Next button (at the bottom).
2.36 Selecting the Recurrence Pattern, ask the following question;
When does it happen? Then click the circle to the left of Daily, Weekly, Monthly or Yearly.
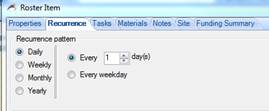
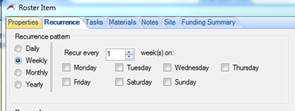
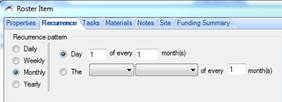
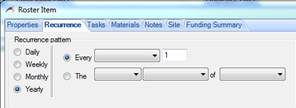
Now fill in the details of how often it happens.
2.37 Now fill in the Range of recurrence.
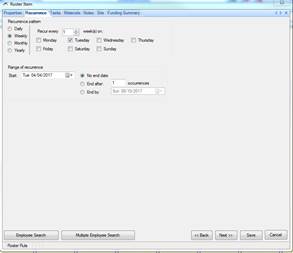
2.38 Check the Start date (it should be the same as the day you selected).
2.39 Then either select end after (how many) occurrences or select an end date.
If there is no end date (which is usually the case) please do not select No end date, as a calendar doesn’t stop and neither will your rule. That much data will slow the system down. So please select an end date of 3 to 6 months away. This can be easily extended.
2.40 You can enter any Notes related to the Rule by clicking on the Note tab at the top and once the note is written click Save Note.
2.14 Now double check your start date and then click Save.
It is highly recommended to recheck the start date, because once you have saved the Rule, this is the only thing you cannot change.